
Repeat a passage while you practise. A marker remembers a position in the song. A range runs between two markers. Turning Repeat on makes that range play again each time it reaches the end.
You can build a range from markers, or capture its start and end during playback with A–B. Both are described below.
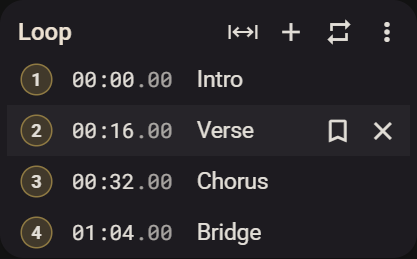
Markers
Use markers for positions you want to return to, such as the beginning of a verse or a difficult phrase.
- Play or seek to the position you want to mark.
- Click Add marker. The new marker takes the current playback time.
- Click its name to give it a recognizable label. Click its number whenever you want to jump back there.
The row also has these controls:
- Time: click the timestamp to edit the marker’s position precisely. Valid changes apply immediately, including changes to a loop boundary.
- Current time: hover over the row to reveal the bookmark button. Click it to move that existing marker to the current playback position.
- Delete: hover over the row to reveal the delete button. The last remaining marker cannot be deleted.
The row actions also remain available while editing and when you navigate with the keyboard.
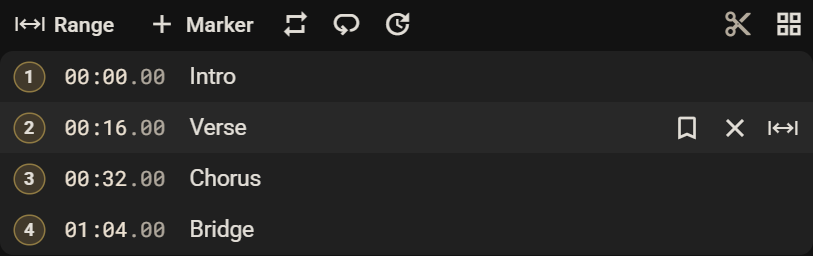
Edit a marker time
Click the part of the timestamp you want to change, then type digits or use the arrow keys. Enter or leaving the field finishes the edit and puts the markers in time order. Escape restores the time from before you started editing.
A time outside the song’s duration is underlined in red. Until you finish the edit, the last valid time stays in use; finishing brings the time within the song’s bounds. If moving a loop boundary makes the start equal to or later than the end, the loop switches off. After correcting the times, turn Repeat on again. Escape restores the marker time but does not restart that loop.
Range
Use Range when you already have markers for both ends of the passage. A range can span several markers: only the two chosen boundaries determine where it starts and ends.
Select a passage
- Have at least two markers at different times. Add another marker if you need a new boundary.
- Click Range, the range icon to the left of . The markers enter selection mode.
- Click one boundary marker, for example the beginning of a verse. Its number is now the first selected boundary.
- Move the pointer over another marker before clicking. The preview highlights the proposed boundaries and the markers between them. You can point to an earlier or a later marker; Transpose puts the two boundaries in time order.
- Click the other boundary to confirm. The loop turns on immediately. You leave selection mode and the Repeat button shows its active state. If playback was paused, press Play to hear the passage.
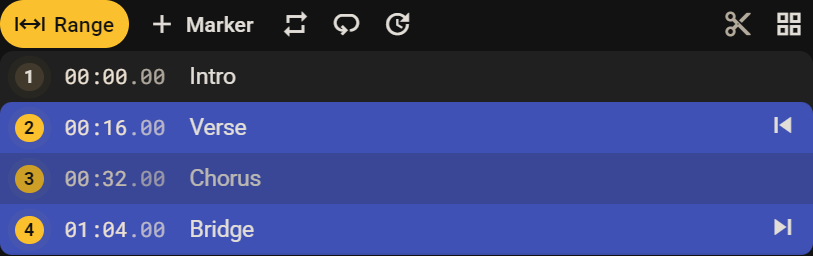
With exactly two markers, clicking Range selects both and turns the loop on immediately. There is no separate first/second-marker step in that case.
During selection, clicking a marker chooses a boundary. Outside selection mode, clicking its number jumps to its time. This explains why the same row behaves differently while Range is active.
Change or cancel the selection
- Click Range again to choose a different pair of markers.
- While selecting, click the first selected marker again, or switch Range off, to cancel and clear the marker range.
- An unfinished selection closes after 30 seconds without a second boundary.
- To keep the chosen boundaries and only stop repetition, use Repeat. Click it again to reuse the range.
- To adjust a boundary without choosing another marker, edit that marker’s time or use its bookmark button at the desired playback position.
Shortcut: hold a marker number for about half a second to select it as the first boundary, then click the other marker. In Side’s blocks view, hold the marker block. This starts the same selection flow without first clicking Range.
If Range is disabled, check that Transpose is connected, processing is switched on and at least two markers exist.
A–B in the playback bar
A and B are the start and end of a passage. Use this button to capture both positions as you listen, without first choosing two existing markers.
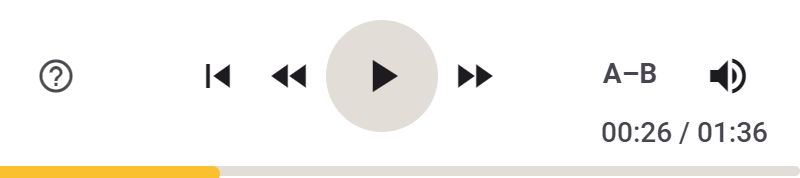
- At the start of the passage, click A–B once to capture A. The button shows that the start is set and it is waiting for the end.
- Let playback reach the end you want, then click the same button again to capture B. The passage starts looping.
- Click the active loop control to stop the loop.
The button’s label follows the active mode. A marker range can show its marker numbers, such as 2–3, instead of A–B. It can also show a clip or whole-song repeat mode; clicking then stops that mode.
Use Range when you want to select named, reusable marker boundaries. Use A–B when you want to capture a passage while listening.
StudioSide
Only in Studio Side, an active A–B loop shows To markers, left of the scissors. Click it to create a marker range: existing markers at the boundaries are reused, missing markers are added and the loop stays active.
Count-in
Count-in adds four beats before the loop starts. In Compact, open in the loop card; in Side, the button is beside Repeat song.
The beats follow tempo and playback speed. Set the tempo in Speed if necessary. Without a known tempo, Transpose uses 100 BPM. Pause or Stop interrupts Count-in without changing the boundaries.
For clips, configure Count-in separately in the clip settings.
Repeat song
Repeat song repeats the entire song. Find it under in Compact or beside the range Repeat button in Side. Choose this when you want to repeat the song rather than a passage between markers.
Return to the loop start
Return to start goes to the beginning of the active loop. Press it a second time within half a second to go to 0:00. Without an active loop, the first press goes straight to 0:00. See Transport.
StudioSide
Marker blocks
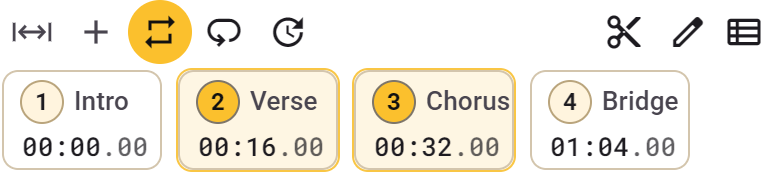
Blocks show each marker’s number, name and time. Click a block to jump to it, or turn Range on to use the blocks as boundaries. Hold a block to start a range from that marker.
Edit exposes time/name editing, the bookmark button and deletion. Shift+click a block also enters edit mode. List view switches to the editable list.
Marker list
Click a number to jump, a time to edit the position, or a name to rename the marker. Hover over a row to reveal Current time, Delete and the row’s Range action. That Range action uses the row’s marker as the first boundary; click another marker to finish.
Blocks view switches back to marker blocks. Add to clips creates a clip from the current valid loop so you can give that passage its own settings.
Timeline
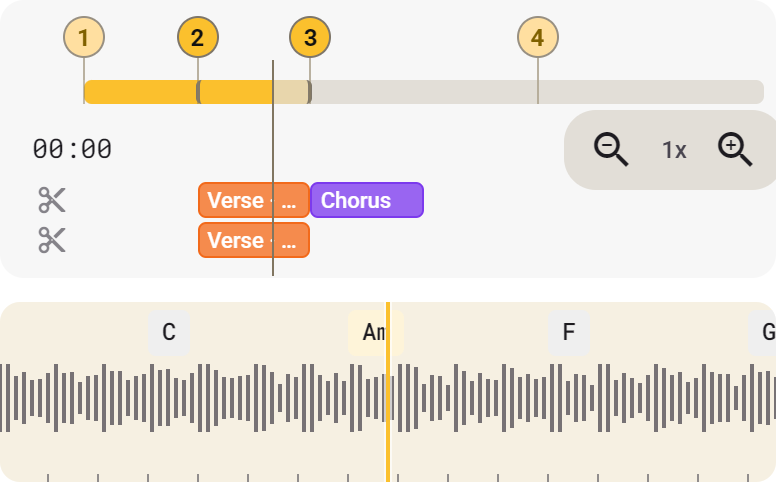
- Markers: drag a numbered marker to change its position. A loop boundary moves with its marker.
- Loop range: the coloured selection shows the passage between the selected boundaries.
- Playback position: click or drag the timeline. Dragging plays short audio fragments; a playing song resumes at the selected position when you release.
- Zoom: zoom in for precise positioning or out for an overview.
- Clips: coloured bars show clip positions relative to the markers and loop.
Show or hide Timeline in Edit scene. The Waveform below has a fixed playhead and separate controls; waveform dragging is silent.